SD card setup
Loading Custom Raspberry Pi Image for Jarvisbot
Step 1: Download the custom image from the link below
Materials Required:
- Raspberry Pi 4B
- MicroSD card (at least 32GB recommended)
- MicroSD card reader (if your computer doesn’t have one)
- Computer (Windows, macOS, or Linux)
- Internet connection
- Power supply for the Raspberry Pi
1.1. Download Raspberry Pi Imager
To set up your Raspberry Pi, you need to install a tool called Raspberry Pi Imager. This software simplifies the process of installing operating systems on your Raspberry Pi’s MicroSD card. The tool is available for different platforms, including Windows, macOS, and Linux. Here’s how you can install it based on your operating system:
Step 1: Visit the Raspberry Pi Imager Download Page
Go to the official Raspberry Pi Imager download page using your web browser. This page offers download links for different operating systems. Raspberry Pi Imager is a small, user-friendly application that automates the process of selecting and installing Raspberry Pi-compatible operating systems.
Step 2: Choose Your Operating System
Once you are on the download page, follow these steps based on your system:
-
Windows: Click the download link for the Windows installer. Once the installer is downloaded, open it and follow the on-screen instructions to install the software on your machine.
-
macOS: If you are using a Mac, click the macOS download link. Open the
.dmgfile and drag the Raspberry Pi Imager into your Applications folder. You might need to provide admin permissions to complete the installation. -
Linux: For Linux users, the installation can vary slightly depending on the distribution. For Ubuntu or any system with Snap package management, you can install the Raspberry Pi Imager directly from the command line. Simply open a terminal and run:
sudo snap install rpi-imager
1.2. Insert the MicroSD Card
To proceed with installing the Raspberry Pi OS, you'll need a MicroSD card (preferably 32GB or more). Follow these steps:
- Insert the MicroSD card into a MicroSD card reader.
- If your computer has a built-in card reader, use it to connect the MicroSD card. If not, you’ll need an external card reader, which you can connect via a USB port.
- Ensure that your computer successfully detects the MicroSD card.
- You may want to check that the card is formatted correctly. If the card is new, you can skip this step, but if it's previously used, consider formatting it before proceeding.
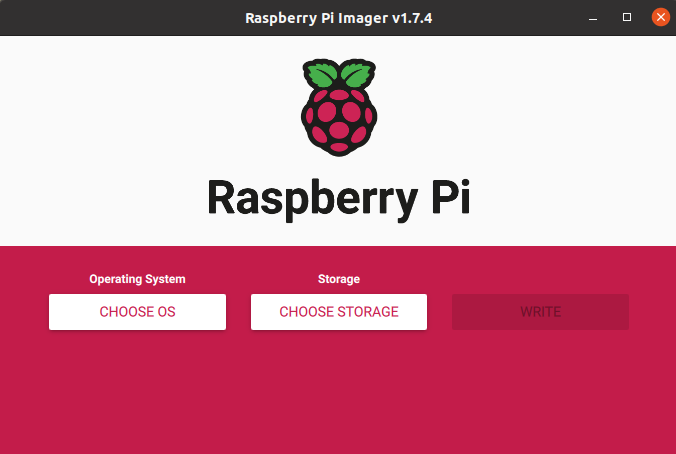
1.3. Open Raspberry Pi Imager
Once your MicroSD card is connected, it’s time to use the Raspberry Pi Imager to flash the OS image onto the card:
- Launch the Raspberry Pi Imager application that you installed in the previous steps.
- On Windows: You can find it in your Start menu or desktop shortcut.
- On macOS: Open it from your Applications folder.
- On Linux: Open the application by searching for it or running
rpi-imagerin your terminal.
- Upon opening, the Raspberry Pi Imager interface will appear, providing you with options to choose an operating system and storage device. This is the tool you'll use to prepare the MicroSD card for your Raspberry Pi.
With the imager open, you're now ready to select the operating system and flash it onto the MicroSD card.
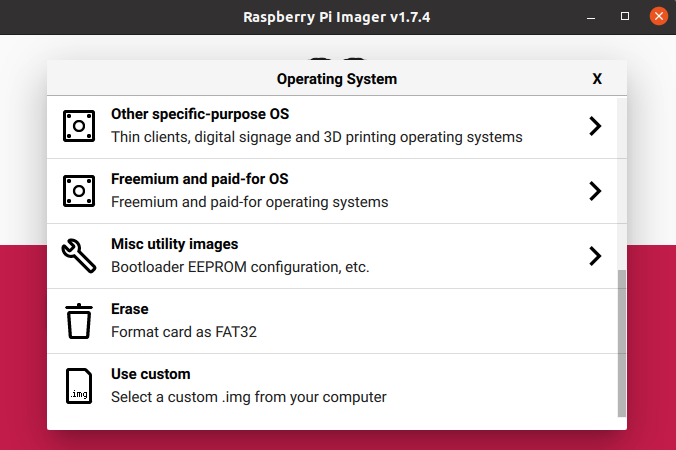
1.4. Choose the Operating System
Now that the Raspberry Pi Imager is open, it's time to select the operating system to install on the MicroSD card:
-
Click on "CHOOSE OS":
- This button will bring up a list of available operating systems. You can choose from a variety of official Raspberry Pi OS versions, as well as other supported options.
-
Scroll down to "Use custom":
- If you've downloaded a custom image file for your Raspberry Pi, scroll down the list and select the "Use custom" option.
-
Select the downloaded custom image:
- A file browser will open. Navigate to the location where you saved the custom image (for example, a
.imgfile), and select it. This image will now be used to install your custom operating system onto the MicroSD card.
- A file browser will open. Navigate to the location where you saved the custom image (for example, a
1.5. Select the Storage Device
Next, you need to choose the storage device where the OS will be installed:
-
Click on "CHOOSE STORAGE":
- This option will display a list of available storage devices connected to your computer.
-
Select your MicroSD card from the list:
-
Be careful to choose the correct storage device, as selecting the wrong one will erase all data on it. Ensure that the device listed corresponds to your MicroSD card.
-
1.6. Write the Image
Once you’ve chosen the OS and the storage device, it’s time to write the image:
-
Click on "WRITE":
- This action initiates the process of writing the selected OS image to the MicroSD card.
-
Confirm any warnings:
- You may see a warning about erasing the disk. Confirm to proceed with writing the image.
-
Wait for the process to complete:
- The Imager will now download the Ubuntu image (if needed) and write it to the MicroSD card. This process may take a few minutes, so be patient.
1.7. Remove the MicroSD Card
Once the writing process is complete, follow these steps:
- Eject the MicroSD card:
- The Imager will notify you when the process is done. Safely eject the MicroSD card from your computer to avoid any data corruption.
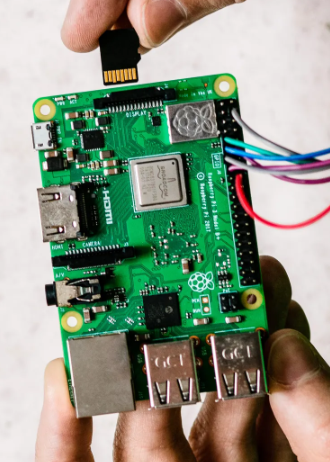
1.8. Insert the MicroSD Card into the Raspberry Pi
- Insert the MicroSD card:
- Carefully insert the MicroSD card into the Raspberry Pi’s card slot, ensuring it is properly seated.
1.9. Connect Peripherals
Before powering up your Raspberry Pi, connect the necessary peripherals:
-
Connect a monitor:
- Use an HDMI cable to connect a monitor to the Raspberry Pi.
-
Plug in a USB keyboard and mouse:
- These will allow you to interact with the Raspberry Pi once it boots up.
1.10. Power Up
-
Connect the power supply:
- Plug the power supply into the Raspberry Pi to start the booting process.
-
Wait for booting:
- The Raspberry Pi should start booting into Ubuntu. This may take a minute or two.
1.11. Initial Setup
Once the Raspberry Pi has booted, you’ll need to complete the initial setup:
- Follow the on-screen instructions:
- Set your preferred language and keyboard layout.
- Create a user account as prompted by the setup wizard.
By completing these steps, you will have successfully set up Ubuntu image file on your Raspberry Pi.